Looking for easy tips to create an ecourse?
The first time I ever created an eCourse, I spent weeks researching stuff. Trying to figure out the technical part of creating an eCourse was so overwhelming. Eventually, I realized I just had to DO IT and stop THINKING ABOUT DOING IT.
I locked myself in a room and spent like 7 hours making all the recordings. After that first time, the process was so much easier.
My advice is to create a short eCourse for your first time around. Maybe just a handful of lessons. It will be less intimidating and it gives you a chance to build confidence in your recording skills.
To give you an idea of how the technical part works for me, I'm sharing four tips with you.
4 Easy to Follow Steps to Create an eCourse
Step #1 Outline Your eCourse Idea (Don't skip this part)
Outline your course idea and break it down into steps that you believe will be easy for students to follow. The information is typically broken out into high-level modules and then more detailed lessons.
A lot of creatives try to skip this step, but having an outline helps to keep you organized and on track.
Here's how I outline my courses.
Step #2 Create Simple Slides From Your Outline
Make presentation slides that include all the lesson information you outlined.
You can use Powerpoint or Keynote, but now I just use the presentation templates in Canva to create my slides.
Step #3 Record Your eCourse Lessons and Be Natural
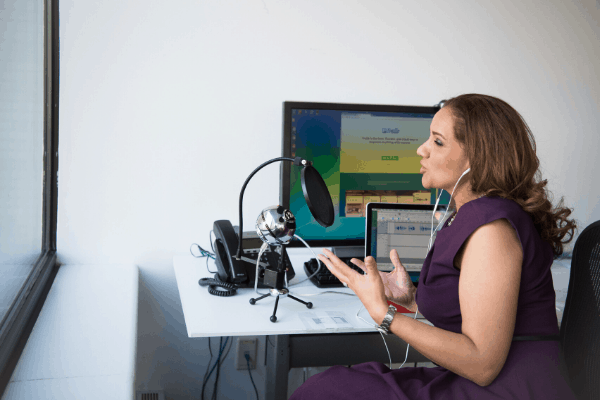
Once your slides are created, begin recording each lesson. To record, I use the Blue Snowball microphone and this webcam.
When I recorded my first course, I used one of those headphone sets that you see customer service agents wearing on television. But the sound was a little fuzzy but it was all I had to work with at the time.
The Blue Snowball mic cost about $50 and works great. I've been using the same one for over 2-years.
To record your screen you can use Screencast-o-matic, Loom, Vimeo, Soapbox.wistia.com, and of course the more expensive software like Camtasia which I purchased but hardly ever use!
Save your money and just use one of the less expensive options I listed above.
When it comes to actually recording your lessons, be natural and keep the lessons short. Try keeping your lessons to no more than 5 minutes or so if you can help it. People have a short attention span.
When I record lessons, I don't aim to be perfect with my words. I know that at some point I will stumble while talking. I laugh it off and keep going with the recording. Having those small mistakes and laughing moments in your course makes you more relatable in my opinion.
You can always do some light editing afterward to fix the recording some. The paid version of Screencast-o-matic allows you to do some light editing. This is typically all I need in terms of editing. But if you feel uncomfortable editing your own recordings, you can hire someone on Fiverr.com or Upwork.com to do it for you.
Note: Not all of your lessons need to be your voice-over slides.
This just happens to be my preferred method. You can have videos of yourself, text-based lessons and even just audio lessons with no text or slides at all. Feel free to mix it up!
Step #4 Download Each Lesson as MP4 File
Download and save each lesson from your screencasting tool to your computer as an MP4 file. Then you can simply upload each file to your online course platform and type in names for the modules and lessons.
I share these tips in hopes that it will make you feel more confident about tackling the technical aspects of creating a course.
If you are more interested in learning more about the tools I use for creating a course, you can read all about those eCourse creation tools here.
As you can see, the steps to create an ecourse do not have to be overly complicated!
When it comes down to it, you can't let the technical component keep you from achieving your goal. You're going to make mistakes…and that's okay. Get started anyway!
Did you enjoy this post about creating ecourses?
You may also enjoy:


1 thought on “How to Create an eCourse in 4 Simple Steps”
Yes, yes, yes to all of this! Especially outlining. People try to just dive in, but planning and preparing a course is a whole different ballgame.