
Looking for a 2020 SiteGround Tutorial for WordPress?
(This post contains affiliate links).
I switched to SiteGround in 2017 after having major issues with my previous hosting platform. I chose SiteGround for these reasons:
- Amazing Customer Service. From helping me to migrate my WordPress blog to solving minor issues that naturally arise when you are running a blog, the SiteGround team has been helpful 100% of the times that I've reached out to them.
- Amazing Uptime. Not once has my website been down since switching to SiteGround. If your website goes down that means a loss of traffic and revenue (this happened to me with a different hosting platform and it's why I switched to SiteGround).
- Fast Loading Time. If you have a blog that takes an extremely long time to load, YOU WILL LOSE WEBSITE VISITORS. When you host your blog with SiteGround, you benefit from the SuperCacher that makes your site load faster. A faster site is better for your visitors and for your Google ranking.
Now, let me walk you through the steps to get started on SiteGround.
Step 1. Choose Your Hosting Plan
SiteGround has three plan options:
The StartUp plan is perfect for people with one website who are just getting started.
The GrowBig plan is a great value for the money and includes the option for multiple websites (This is the plan I'm one!)
The GoGeek plan is perfect for people with e-commerce and larger sites.

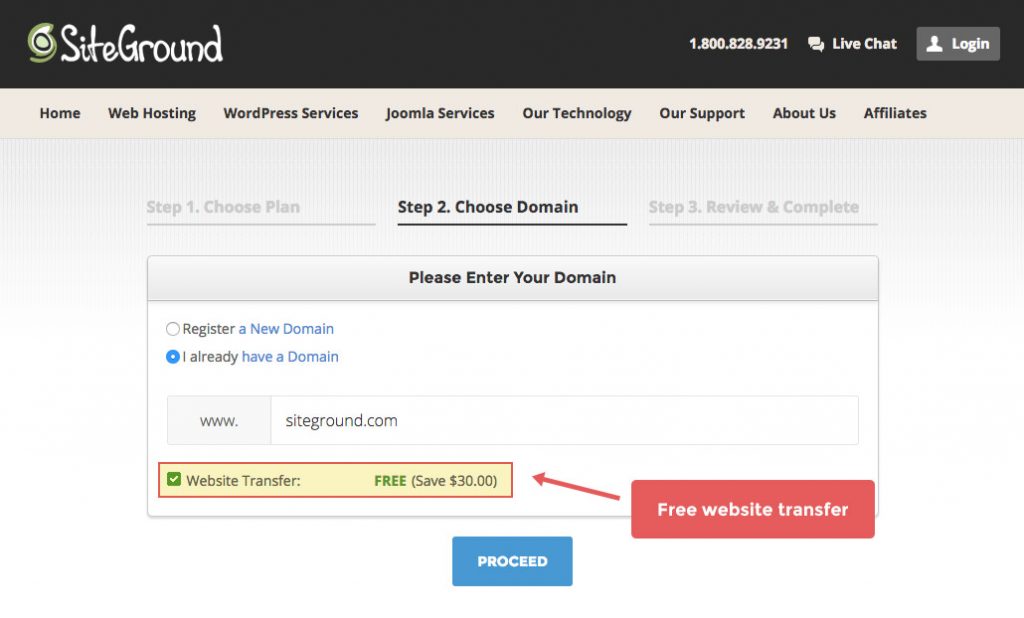
Step 2. Choosing Domain
You can choose to buy a new domain, or sign up with an existing domain. If you have a website hosted somewhere else, you can transfer it to SiteGround for no extra cost! They offer a free website transfer that is included in the SiteGround hosting service.
Step 3. Review and Complete

Step 4. Once the above steps are complete, it's time to install WordPress!
This step in the process is relatively easy. However, just in case you are feeling a little of what I like to call “tech stress”, please know that you can totally have a SiteGround customer service rep complete this step for your (I told you they were super helpful, didn't I?)
All you need to do is click on the live chat option at the top of the page and ask the customer service rep to set up your site and send you your WordPress credentials!
To install WordPress on your own, follow these steps:
- Navigate to the “My Accounts Tab” and click on the red “Go to cPanel” button.
- Once there, click on the blue “WordPress Installer” icon under WordPress Tools.
- Next, click on the blue “Install” tab.
You will have the following values to fill in on the screen:
- Choose Protocol: If you are on the Grow Big plan (or higher), then choose HTTPS because the plan comes with it. Otherwise, choose HTTP.
- Choose Domain: Pick your domain name from the list.
- In Directory: Leave this blank.
- Site Name: Write the name of your site (can be changed later).
- Site Description: Write a description for your site (can be changed later).
- Admin Username: You will use this to log-in to your blog.
- Admin Password: You will use this to log-in to your blog.
- Admin Email: Enter your email address.
- Select Language: Choose your preferred language (English, Spanish, etc.)
- Choose a Theme to Install: Leave this blank for now. You can install your theme later (see below).
Click Install! Wallah! You have a WordPress blog!
Using your WordPress Credentials
At this point, you will now need to use your WordPress credentials to log-in to the backend of your WordPress account.
You will want to hover over the “Appearance” tab and click “Themes”. Here you will install a WordPress theme. This is what I call the “beautification process”.
I use Genesis Framework Child Themes for Mompreneur Money. I also recently started using a BluChic Theme for my personal development blog and I love it!
My biggest advice is to buy a WordPress theme from a trusted developer with good customer service. If you have an issue with your theme, you want to be able to contact the developer you purchased it from and get support.
Once your theme is installed, it's time to start writing blog posts, building your email list, and working on your traffic and monetization strategies!