
Ready to create an online course using CourseCraft?
Have you heard of the Teachable alternative called CourseCraft?
Once you finally decide that you are ready to create an online course, there are many decisions to be made including:
What topic to teach?
How long should the course be?
What format should you use?
How much should you charge?
And the list goes on and on.

Deciding on the best platform to host your online course is also a major decision to be made.
I’ve been pretty vocal on this blog about my love for Teachable (and Thinkific) for course creators. I find that these platforms offer affordable, user-friendly solutions that help create a great user experience.
However, there’s a more recent player in the online course platform arena that I believe is worth considering.
That player is CourseCraft.
After hearing from a few of my readers about CourseCraft, I wanted to test the platform out for myself.
I was most interested in seeing the capabilities of the free plan, but I also wanted to see how long it would take to upload a previously recorded course and see if it was aesthetically pleasing to the eye (I hate clunky, ugly-looking course platforms).
Below is a quick tutorial of the steps I took to create an online course on the CourseCraft platform.
Note: This post contains affiliate links to products I trust and love.
7 Steps to Create an Online Course with CourseCraft
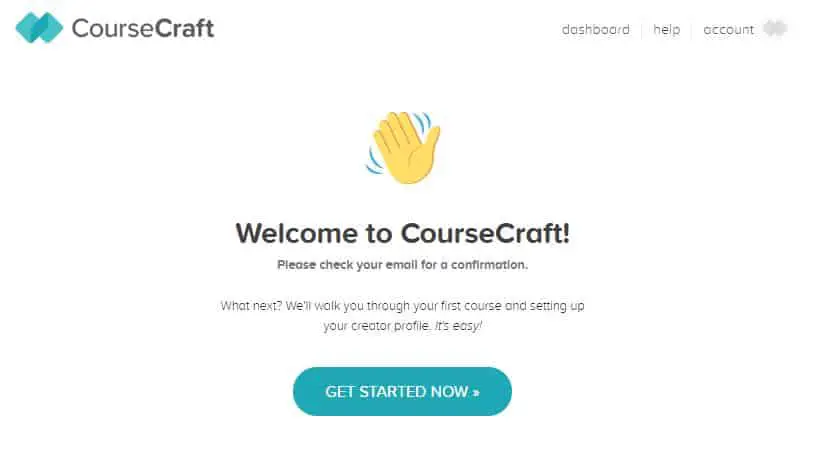
Step One: Get Started with CourseCraft
Once you enter your email address on the CourseCraft homepage, you’ll be taken to the welcome page where you will be prompted to click the “get started now” button.
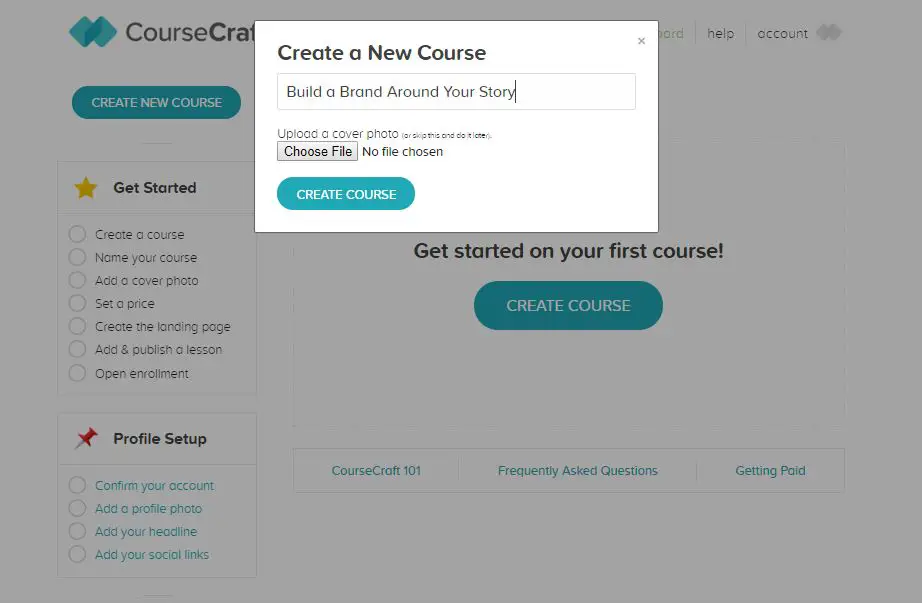
Step Two: Create a New Course
Click the “create new course” button and type in the name of your course. (You can wait until later in the process to add a cover photo.) Then click the “create course” button.
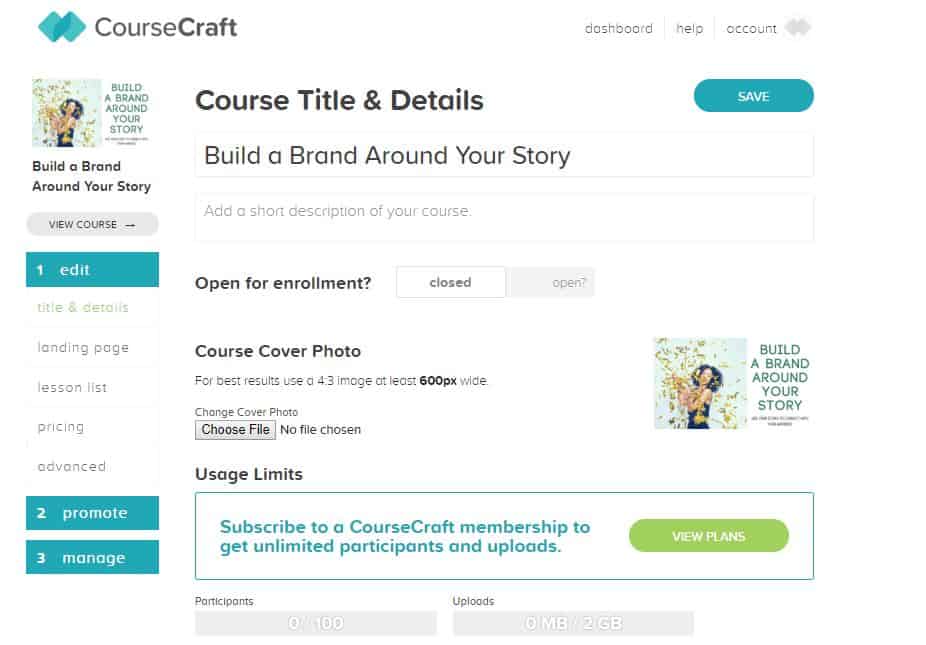
Step Three: Add Your Course Details
At this point, you are able to edit your course details including your title, short description, and cover photo (this should be at least 600 pixels wide).
Don’t make your course open for enrollment just yet. You will come back to this point once you’ve uploaded your lessons.
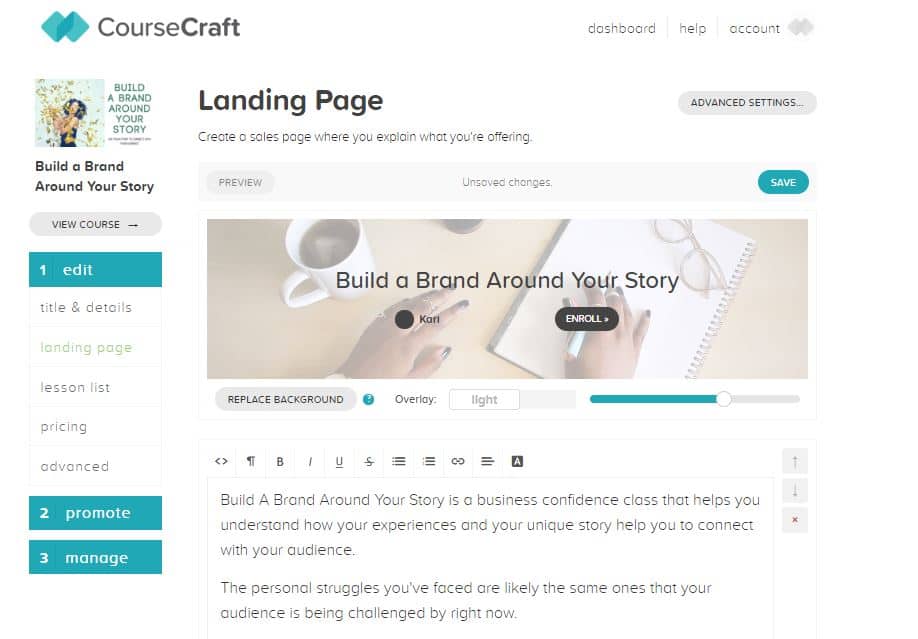
Step Four: Create Your Landing Page
The landing page is what your future students will see when they initially click on your course link. It is here that you can write copy to help readers better understand the benefits of taking your course.
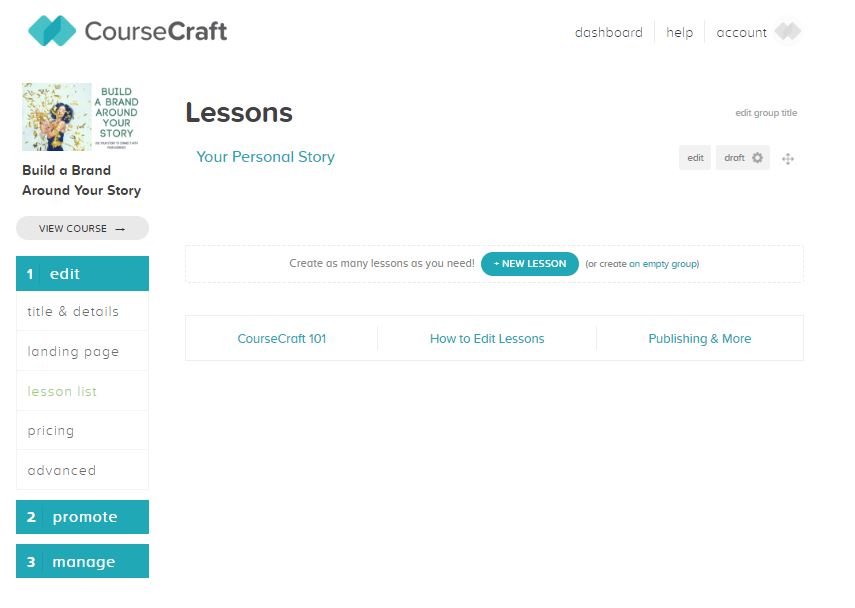
Step Five: Upload Your Course Lessons
Now it’s time to add your lessons. You are able to add text, audio, and video. However, if you want to add a downloadable document such as a workbook or checklist, you will need to upgrade to the basic “club” plan first.
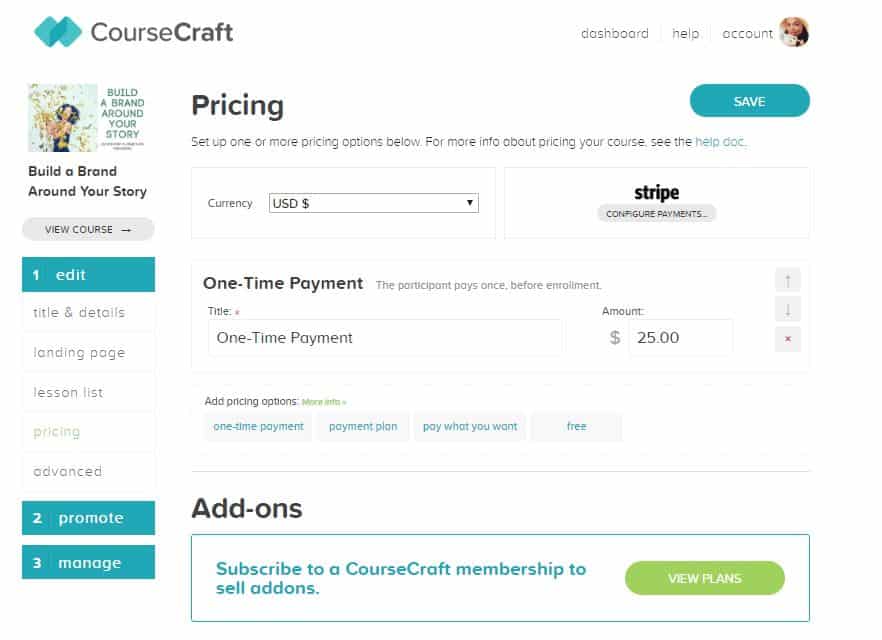
Step Six: Choose Your Pricing
You can choose whatever course price you like. This means you can offer your students the option to take the course for free, pay a one-time fee, pay on a payment plan, or offer them a “pay what you want” option.
You will have to configure your Stripe account or PayPal account for payments.
Step Seven: Publish Your Course!
Go back to your “edit” tab. Find the wording that says “open for enrollment” and click open. This will make your course live.
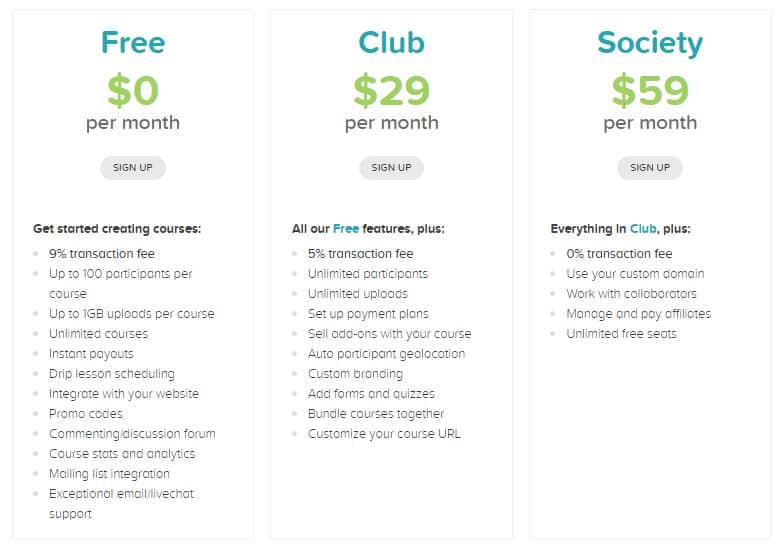
Comparing the CourseCraft Plans:
Unless you already have a built-in audience that is primed for purchase, I would encourage most people to create an online course by first starting with the free plan.
However, keep in mind that using a free plan comes with limitations. You cannot:
- Have more than 100 students
- Offer downloads or upsells
- Use your own logo or a customized URL
- Upload more than 2 GB
To do any of these things, you will need to upgrade to at least the “Club” level.
Here’s a comparison of each plan level:
Other Features:
The promo tab offers a variety of ways to help you promote your course. One feature that I really like is that it creates a short HTML code that allows you to embed an image link/button on your blog.
You can also offer promotional codes, offer bundled courses and offer an affiliate program if you upgrade your plan.
Final Thoughts and Next Steps
My overall assessment of CourseCraft is that it has a friendly user-interface, it’s affordable, and it has many of the same features as the other major players in the course platform arena.
It took me less than an hour to create an online course on the platform, upload my videos, and hit publish.
Of course, I was able to do this because I already had my course content created and ready to upload.
If you can afford to start with the $29 per month plan it might be worth the investment to access the extra features described above. If not, no worries. The free plan is a good start.
If you need help planning and creating your first online course, come and enroll in my epic course creator program for step-by-step instructions on how to easily create your first online course.
Creating an Online Course
Keep Learning:
How to Create a Money-Making Online Course on a Budget
Best Platforms to Create and Sell Online Courses
Where Should You Teach Online Classes? Skillshare, Udemy, Teachable or Thinkific


2 Responses
Thank you so much for this awesome tutorial! So glad that you found CourseCraft easy to use and affordable. 🙂
My pleasure 🙂 and thank you for commenting! I hope more people learn about your amazing platform and give it a try. xo