
How to Create an Online Quiz
There are many different ways to engage your audience and grow your email list. Creating an online quiz is a great way to really get to know your readers and make their experience on your blog more personal and engaging.
In this post, I will walk you through the steps I took to create an online quiz using a tool called Interact. Let’s get started!
Step #1: Sign-up for the online quiz software
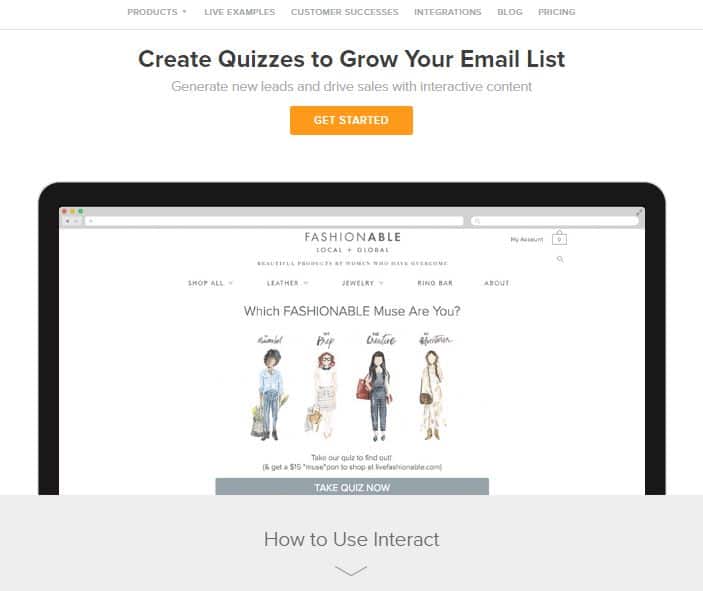
First, go to Tryinteract.com to register and get started.
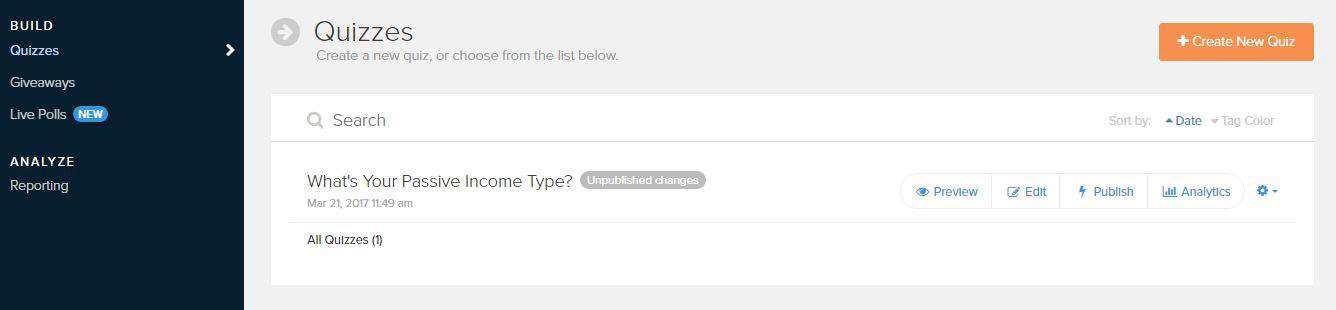
Once registered, you will be taken to your dashboard. You will need to click on the orange button that says create a new quiz.
Step #2: Choose your quiz type
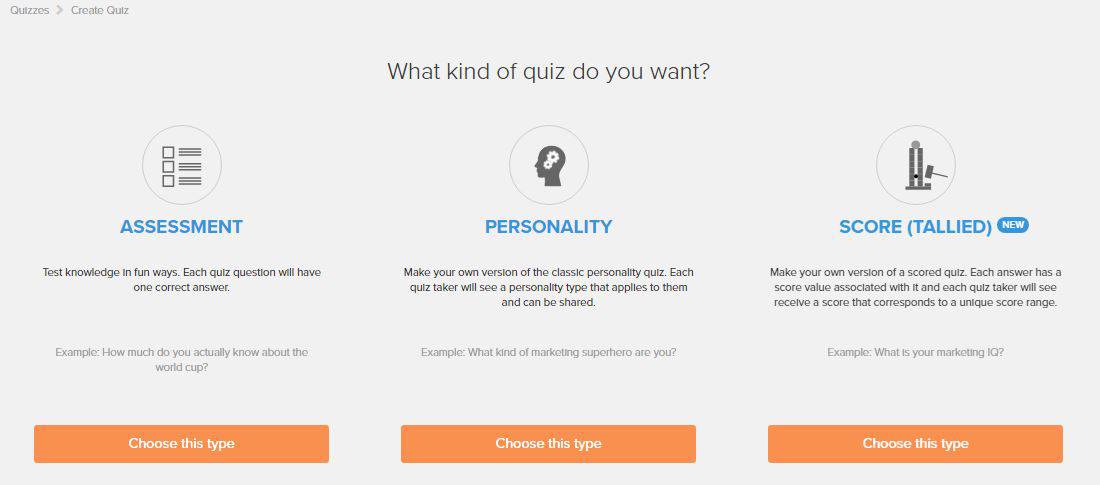
Next, you will need to choose your quiz type. When I built my Passive Income Type Quiz, I used the “personality” style quiz. My suggestion is to get started with this type first if it’s your first time.
Step #3: Choose tour quiz template
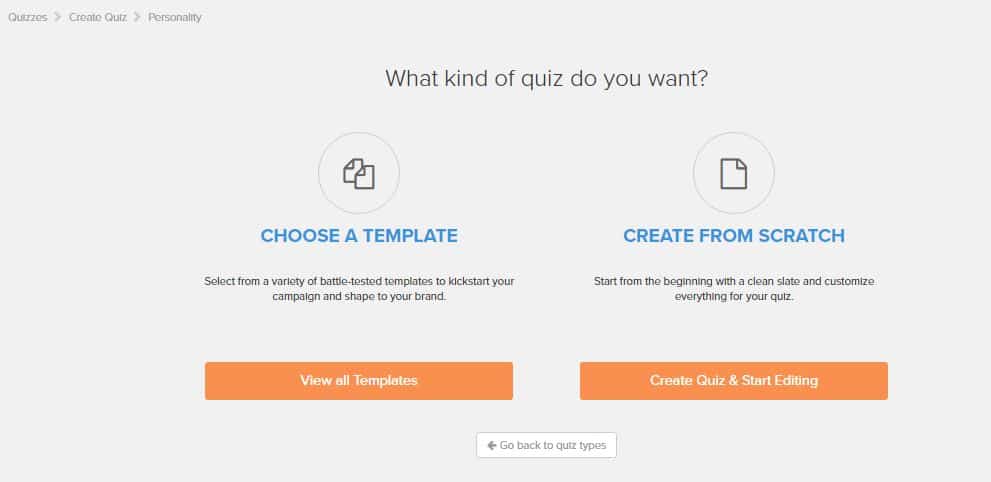
You can then choose to start using a template or start from scratch. I suggest you start using a template like I did. It’s nice to have a premade layout that you can them tweak to make your own.
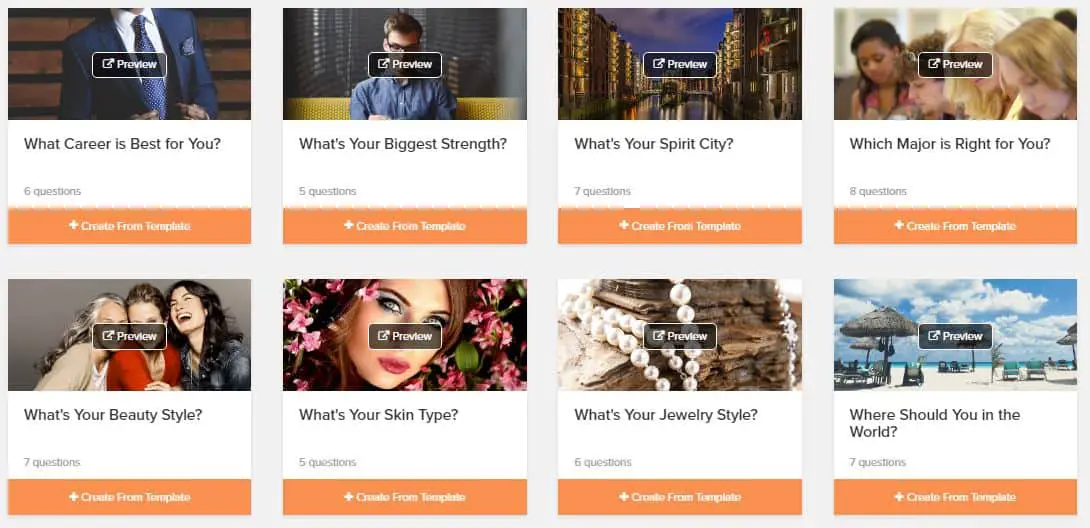
Now it’s time to choose a template. There are some really great templates available from Interact. My advice is to scroll through all the templates once or twice, then choose the one that seems like the best fit to the type of quiz you want to make. Again, these are just starting templates for you to use…don’t go looking for an exact match–you will drive yourself crazy. I started with the “What Kind of Entrepreneur Are You” template.
Step #4: Build your online quiz
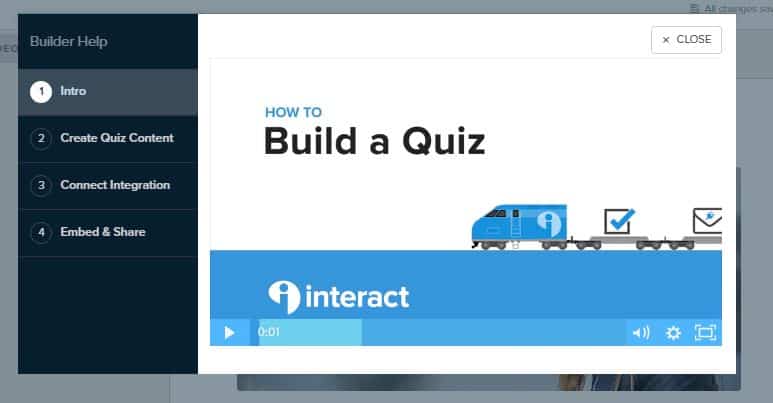
Once inside the template, the real work begins. They great thing about Interact is that they provide you with helpful videos that you can click right inside the builder to get help on the spot (see the “help videos” tab in the upper left of the page.)
When you click the “help videos” tab this is what pops up. I suggest you view these short videos and simply implement what you see. it was very helpful for me, especially video #2.
Before you start connecting any form of integrations or lead capture areas, you will want to build out your content section. The content section can be found to the left of the page. In a nutshell, your content area is broken down into 3 parts… Cover…Results…Questions.

Cover Section
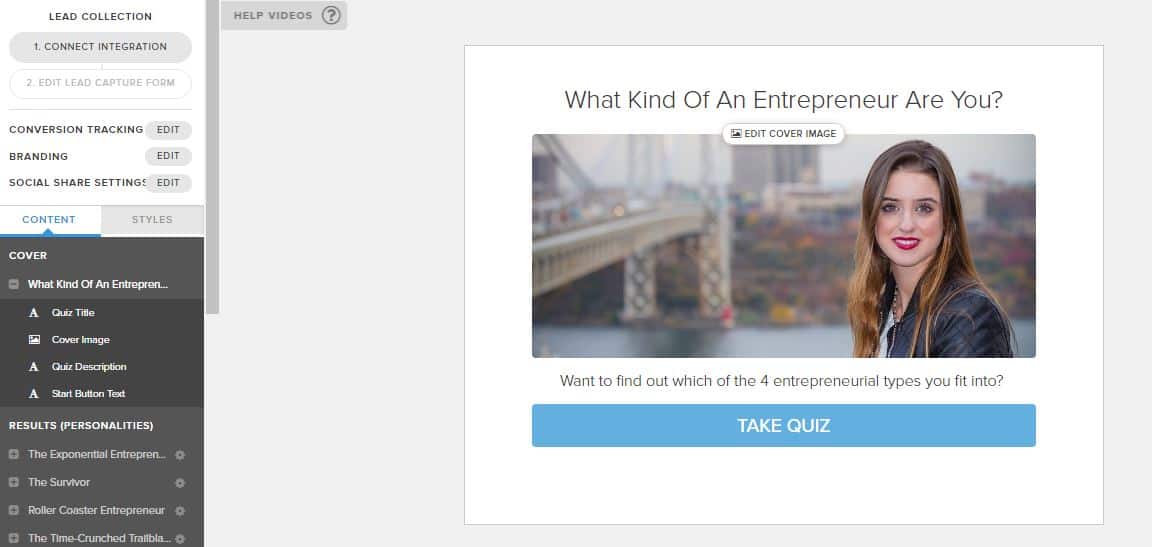
Under the Cover section, you will need to customize your quiz title, image, description, and button. For you quiz title, it’s a good idea to create a title using this guideline, “What [blank] are you? And for your image, it’s a great idea to use a picture with smiling, happy people if possible. Doing this may result in higher conversions. Click here to read more best practice ideas offered by Interact. Scroll back up to see my quiz title, image, and description.
Oh, and don’t worry if you don’t have your own images, the platform allows you to grab royalty free pictures from Pixabay.
Results Section
In my opinion, you should come up with your different quiz results first, then work backward to create questions that lead to those results. For instance, in my quiz, there were 3 potential results: The Affiliate Marketer, The Book Publisher, or the Course Creator. Knowing these results ahead of time, helped make it easier to come up with questions to ask the quiz taker.
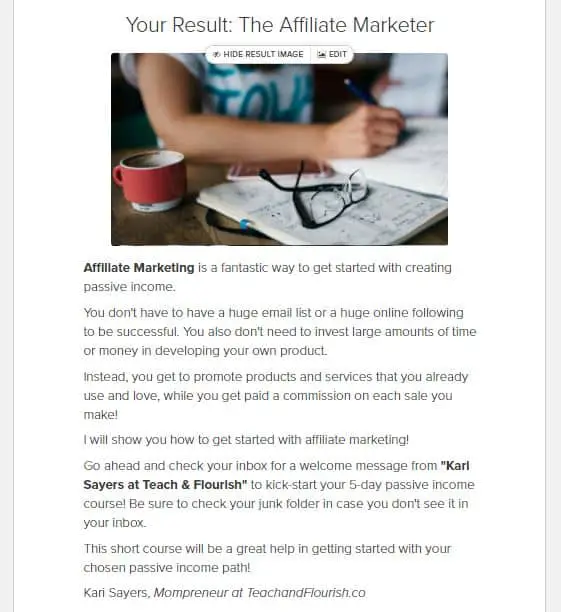
You will also be prompted to write a little explanation for each result. The explanation just helps the quiz taker to see positivity in their result and want to move forward with whatever end-goal you suggest for them. Here is an example of one of the results from my quiz…
Questions Section
For your first quiz, I suggest starting with 5-7 questions. Speak like yourself when you write the questions…no like a robot. Also, be clear in what you are asking. Again, here are the quiz-making best practices to take a glance at.
Coming up with 7 questions was probably the hardest part for me. I took a look through several of the quizzes offered by other clients of Interact. This gave me a better idea of how I wanted to layout questions and results.
I was trying to find a good balance of questions that didn’t overly push the quiz taker in any particular direction…and it started to feel like I was making it harder than it needed to be. So I just chose questions that I would have wanted to answer if the quiz was for me.
Step #5: Connect each quiz answer with a result
The way the quiz works is that it associates each answer with a particular result. Then, at the end of the quiz, it tallies up all answers to see which result showed up most frequently. In order for this to work properly, you will have to associate each answer with a result. The example below shows one of my quiz questions and what it looks like to connect each answer with a result. It’s connect the dot. Pretty simple.

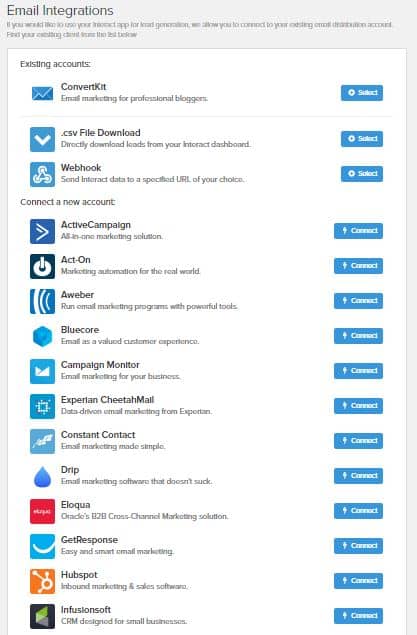
Step #6: Connect your quiz to your email marketing account
Interact allows you to connect your quiz to your existing email marketing account. The platform connects with most of the major email marketing systems on the market right now. I use ConvertKit for my email marketing and was able to easily connect my quiz to an email sequence inside my ConvertKit account.
Once you connect your integrations, you will be able to set up your lead capture form. The purpose of this form is to encourage the quiz taker to give you their email address in exchange for their quiz results + another awesome freebie you come up with. My freebie is a free 5-day passive income course to help them learn some immediate strategies they can implement to start earning passive income.

Step #7: Publish your quiz and share it
The final step is to hit Publish on your quiz and SHARE SHARE SHARE! You can embed your quiz on your website, grab a direct URL to the quiz and send traffic there, or download the Interact WordPress plugin.
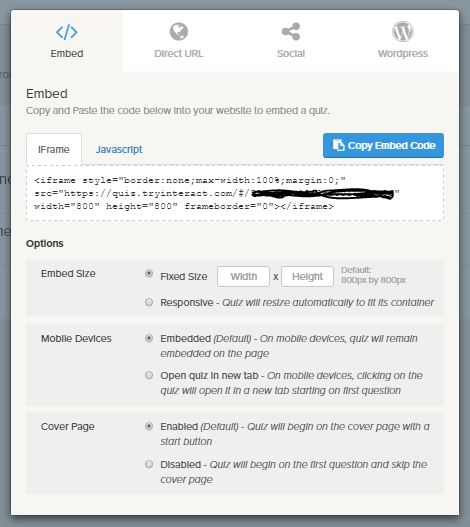
Personally, I decided to create a web page on my WordPress website and embed the quiz directly on the page using the iframe code.
Wrapping up
After you publish your quiz you are done! Basically, you’ve done a large amount of the work up front and now it’s up to you to market your quiz and nurture the leads you collect from it.
Keep in mind that some people will go through all your quiz questions and then decide they do not want to give you an email address for their results–it happens. The best thing you can do is to make your free offer so good that they feel like they ABSOLUTELY need to put in their email address and get their results.
Another thing you can do is allow people to skip the email collection part. If you choose to do this, I highly suggest that you at least add a link that leads people to a monetized page on your website. Unless you are just offering a quiz out of the goodness of your heart, the quiz should result in leads or some type of potential monetary gain.
Click here to get started with Interact!
If you have any questions about starting your first quiz feel free to add a comment to this post. If you do use this tutorial to build a quiz, I would love to check it out!
How to Create a Quiz for Your Blog
Keep Learning:
How to Market Your Side Hustle


2 Responses
A good point by point tutorial. Thank you for sharing this, Kari. I am very interested in trying to create quizzes for email list growth.
My question is about the pricing of Interact. I checked it and it seems like you can’t collect emails if you use the free version of the service. Is that correct in your own experience? Is there a trial to try the paid version out before purchasing?
Hi Mervi! Glad you found this helpful! From a quick glance at your website, I’d bet that a quiz would work awesome for you based on the content I saw.
As far as pricing, you cannot collect email addresses on the free version. The free version will basically just allow you to get in there and familiarize yourself with the backend area of the tool and build out a quiz or two. You can of course share it with your current audience…maybe if you want them to test it out and give you feedback before you release it to the world? However, the biggest value will be in being able to collect those new leads. So, you would need to start with the Lite version at the very least in order to collect emails and integrate your email marketing account. They do offer a 7-day free trial for the Lite version.
If you decide to make a quiz, please keep me in the loop and drop a note here so we can check it out =)